How to use ch8r?
Get started with ch8r by following the built-in onboarding guides. Each step builds on the previous, taking you from initial setup to a fully configured AI support agent.
Connect Your AI Provider
The first onboarding guide prompts you to connect an AI provider. This connection enables ch8r to generate AI responses and process your knowledge base.
To connect your AI provider from the onboarding guide:
- Select your provider from the dropdown.
- Enter your API Key in the API Key field.
- Click Create.
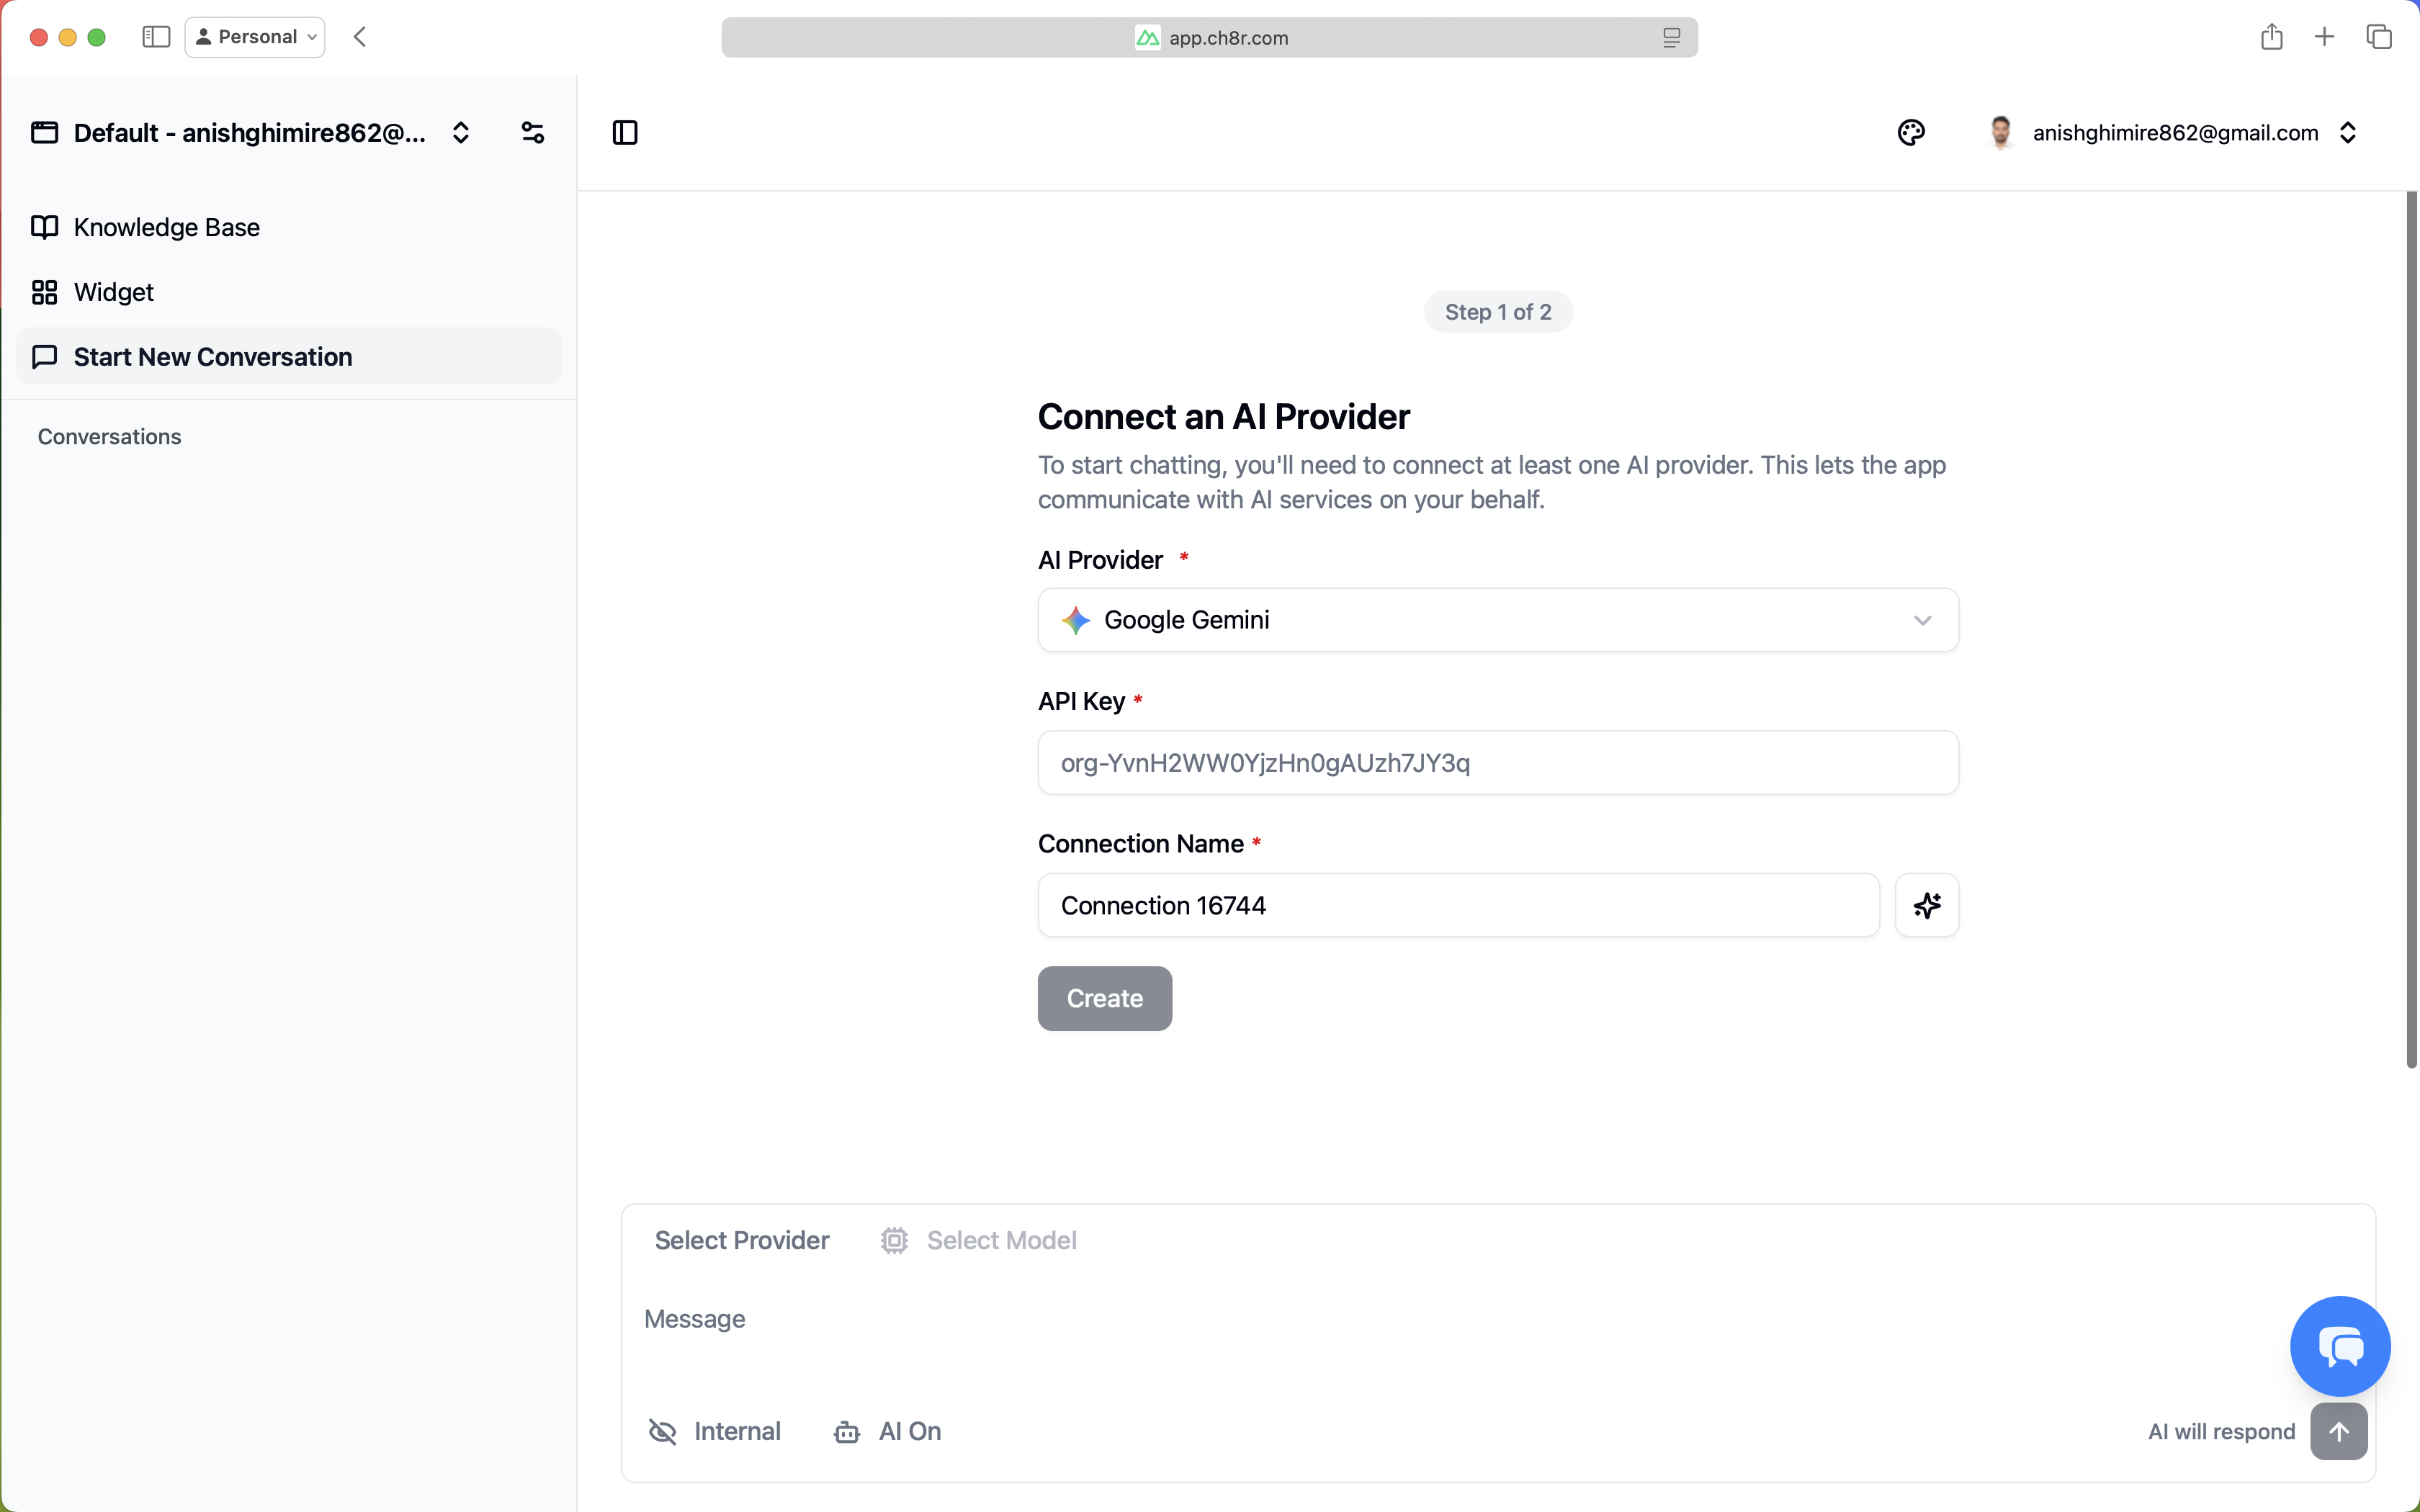
ch8r validates your credentials immediately and retrieves available models from the provider. Once created, your provider appears in the list with a model count badge.
Configure Your Text Model
The second onboarding guide configures the text model that generates responses to user queries.
To configure your text model from the onboarding guide:
- In the onboarding guide, you'll see available text models fetched from your connected provider.
- Select a model (e.g.,
gemini-1.5-proorgemini-1.5-flash). - Click Configure.
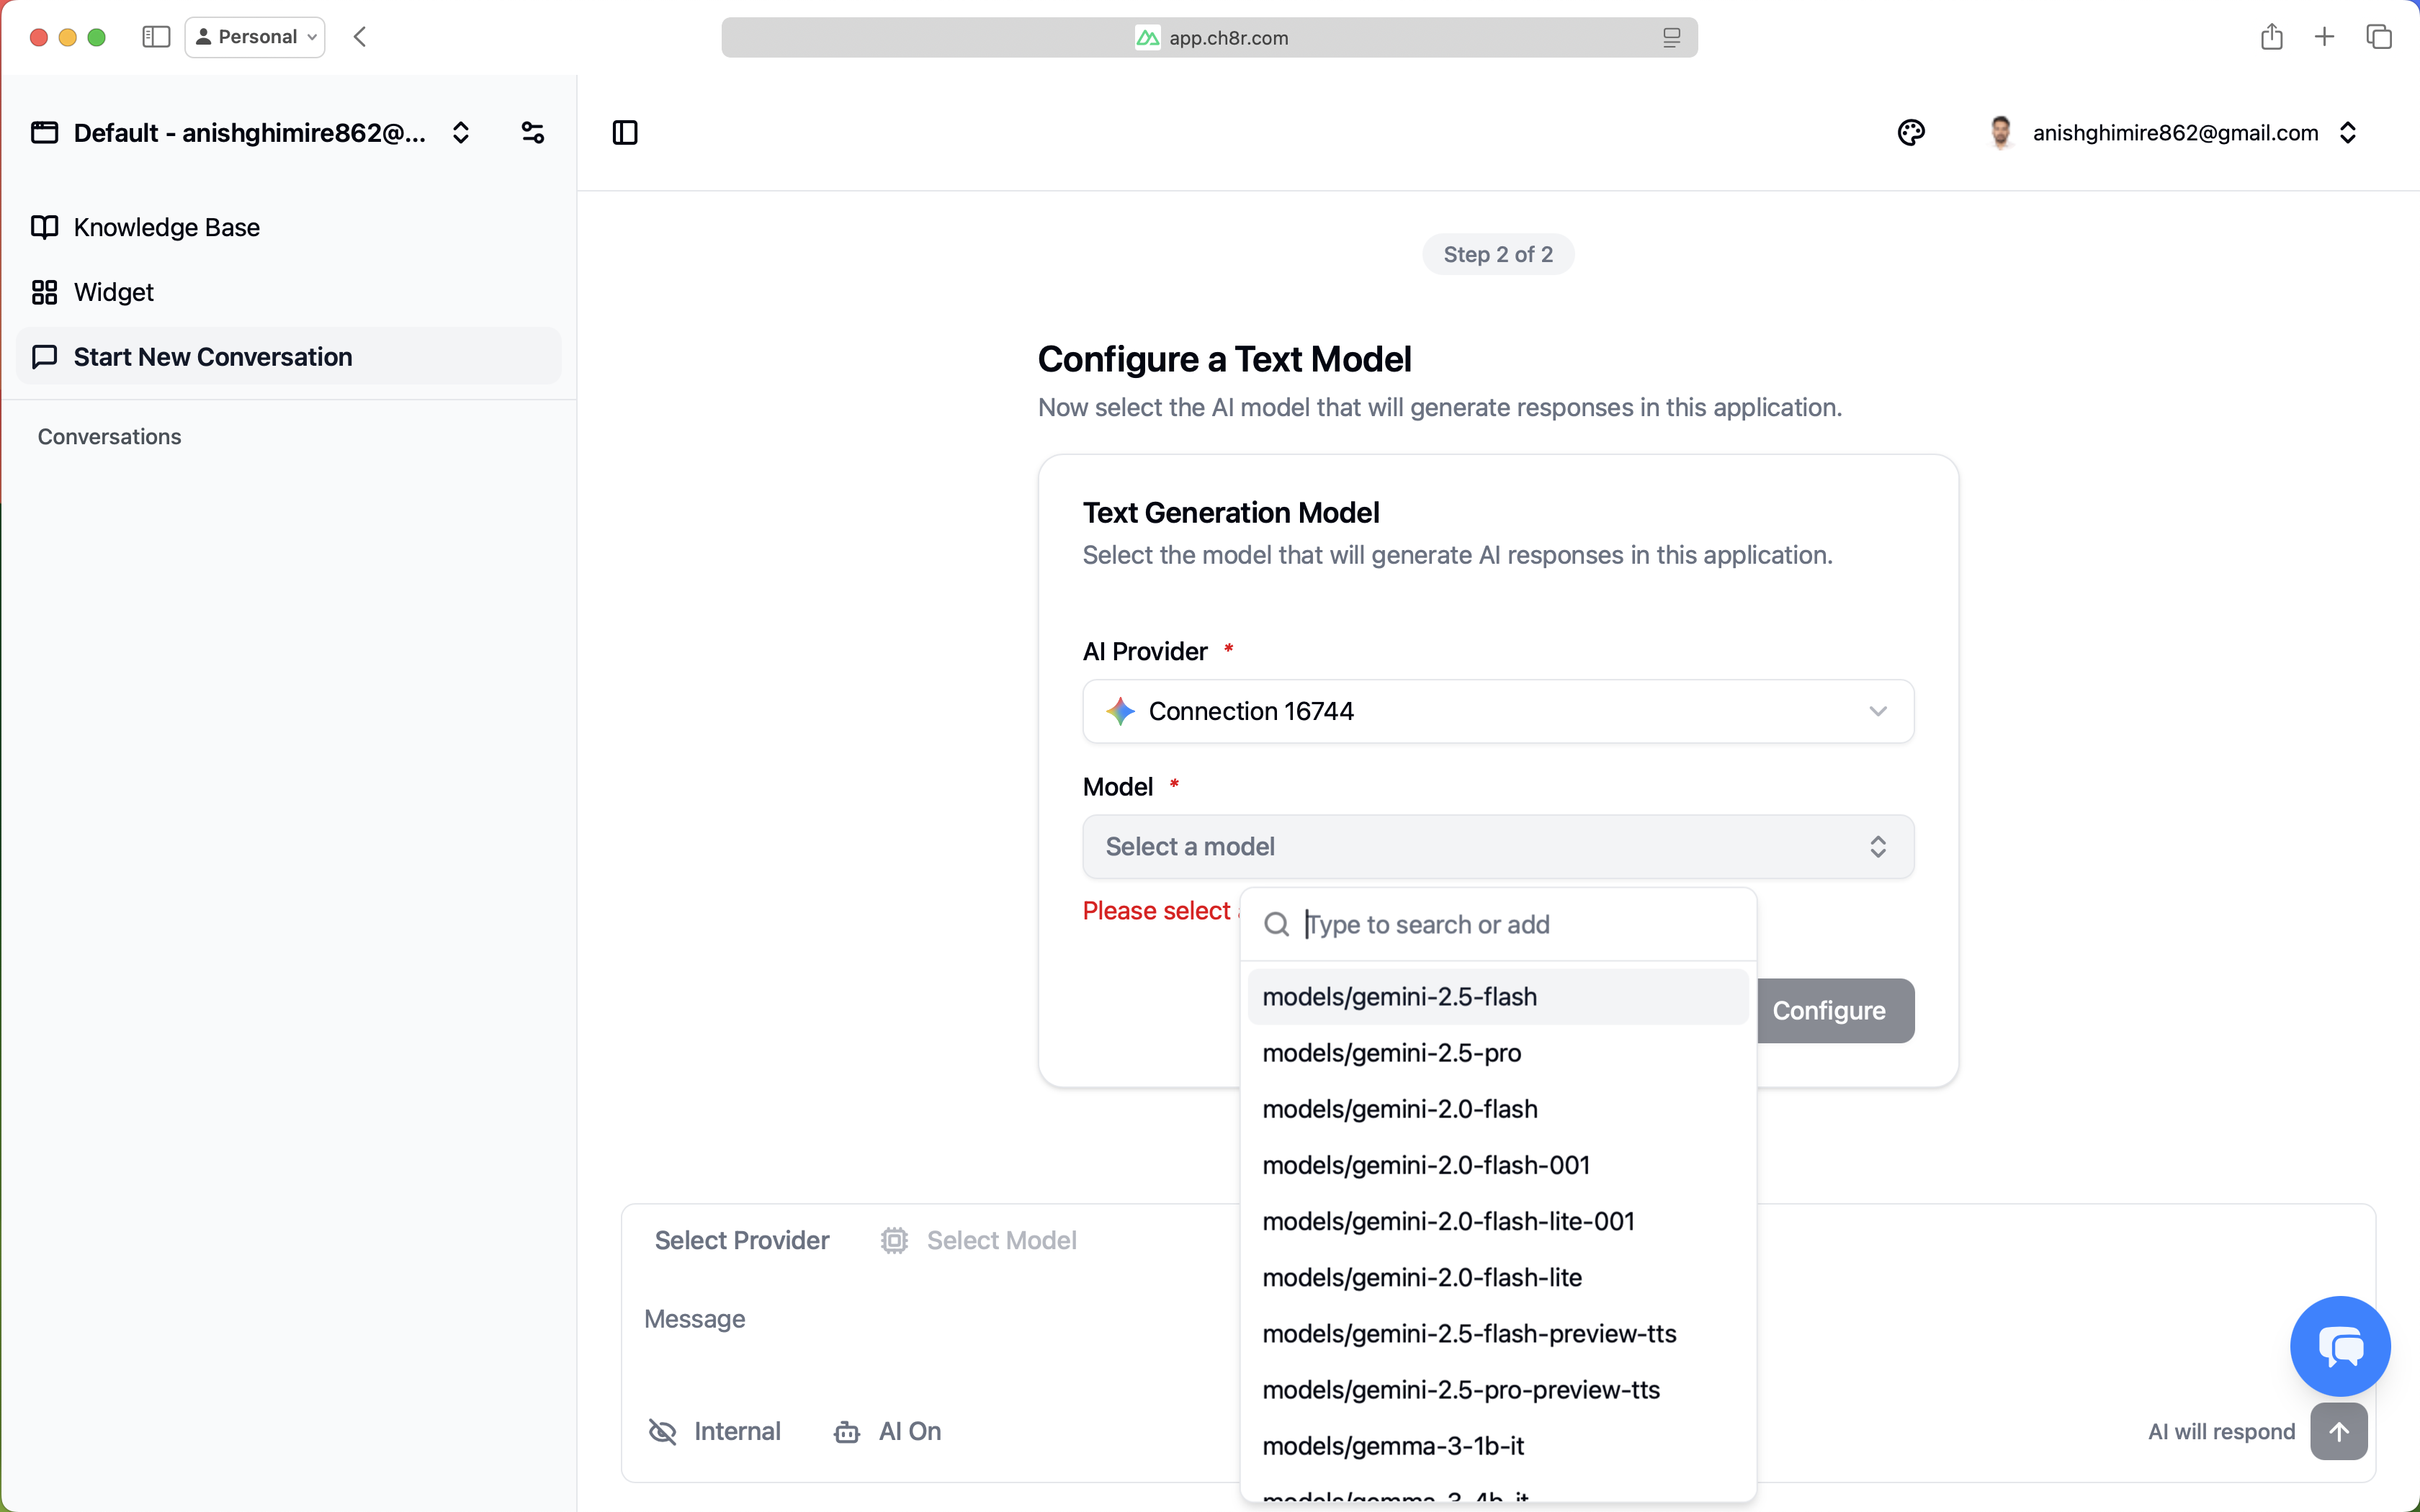
At this point, you can start chatting with your AI. Navigate to your application's chat interface and begin testing basic conversations.
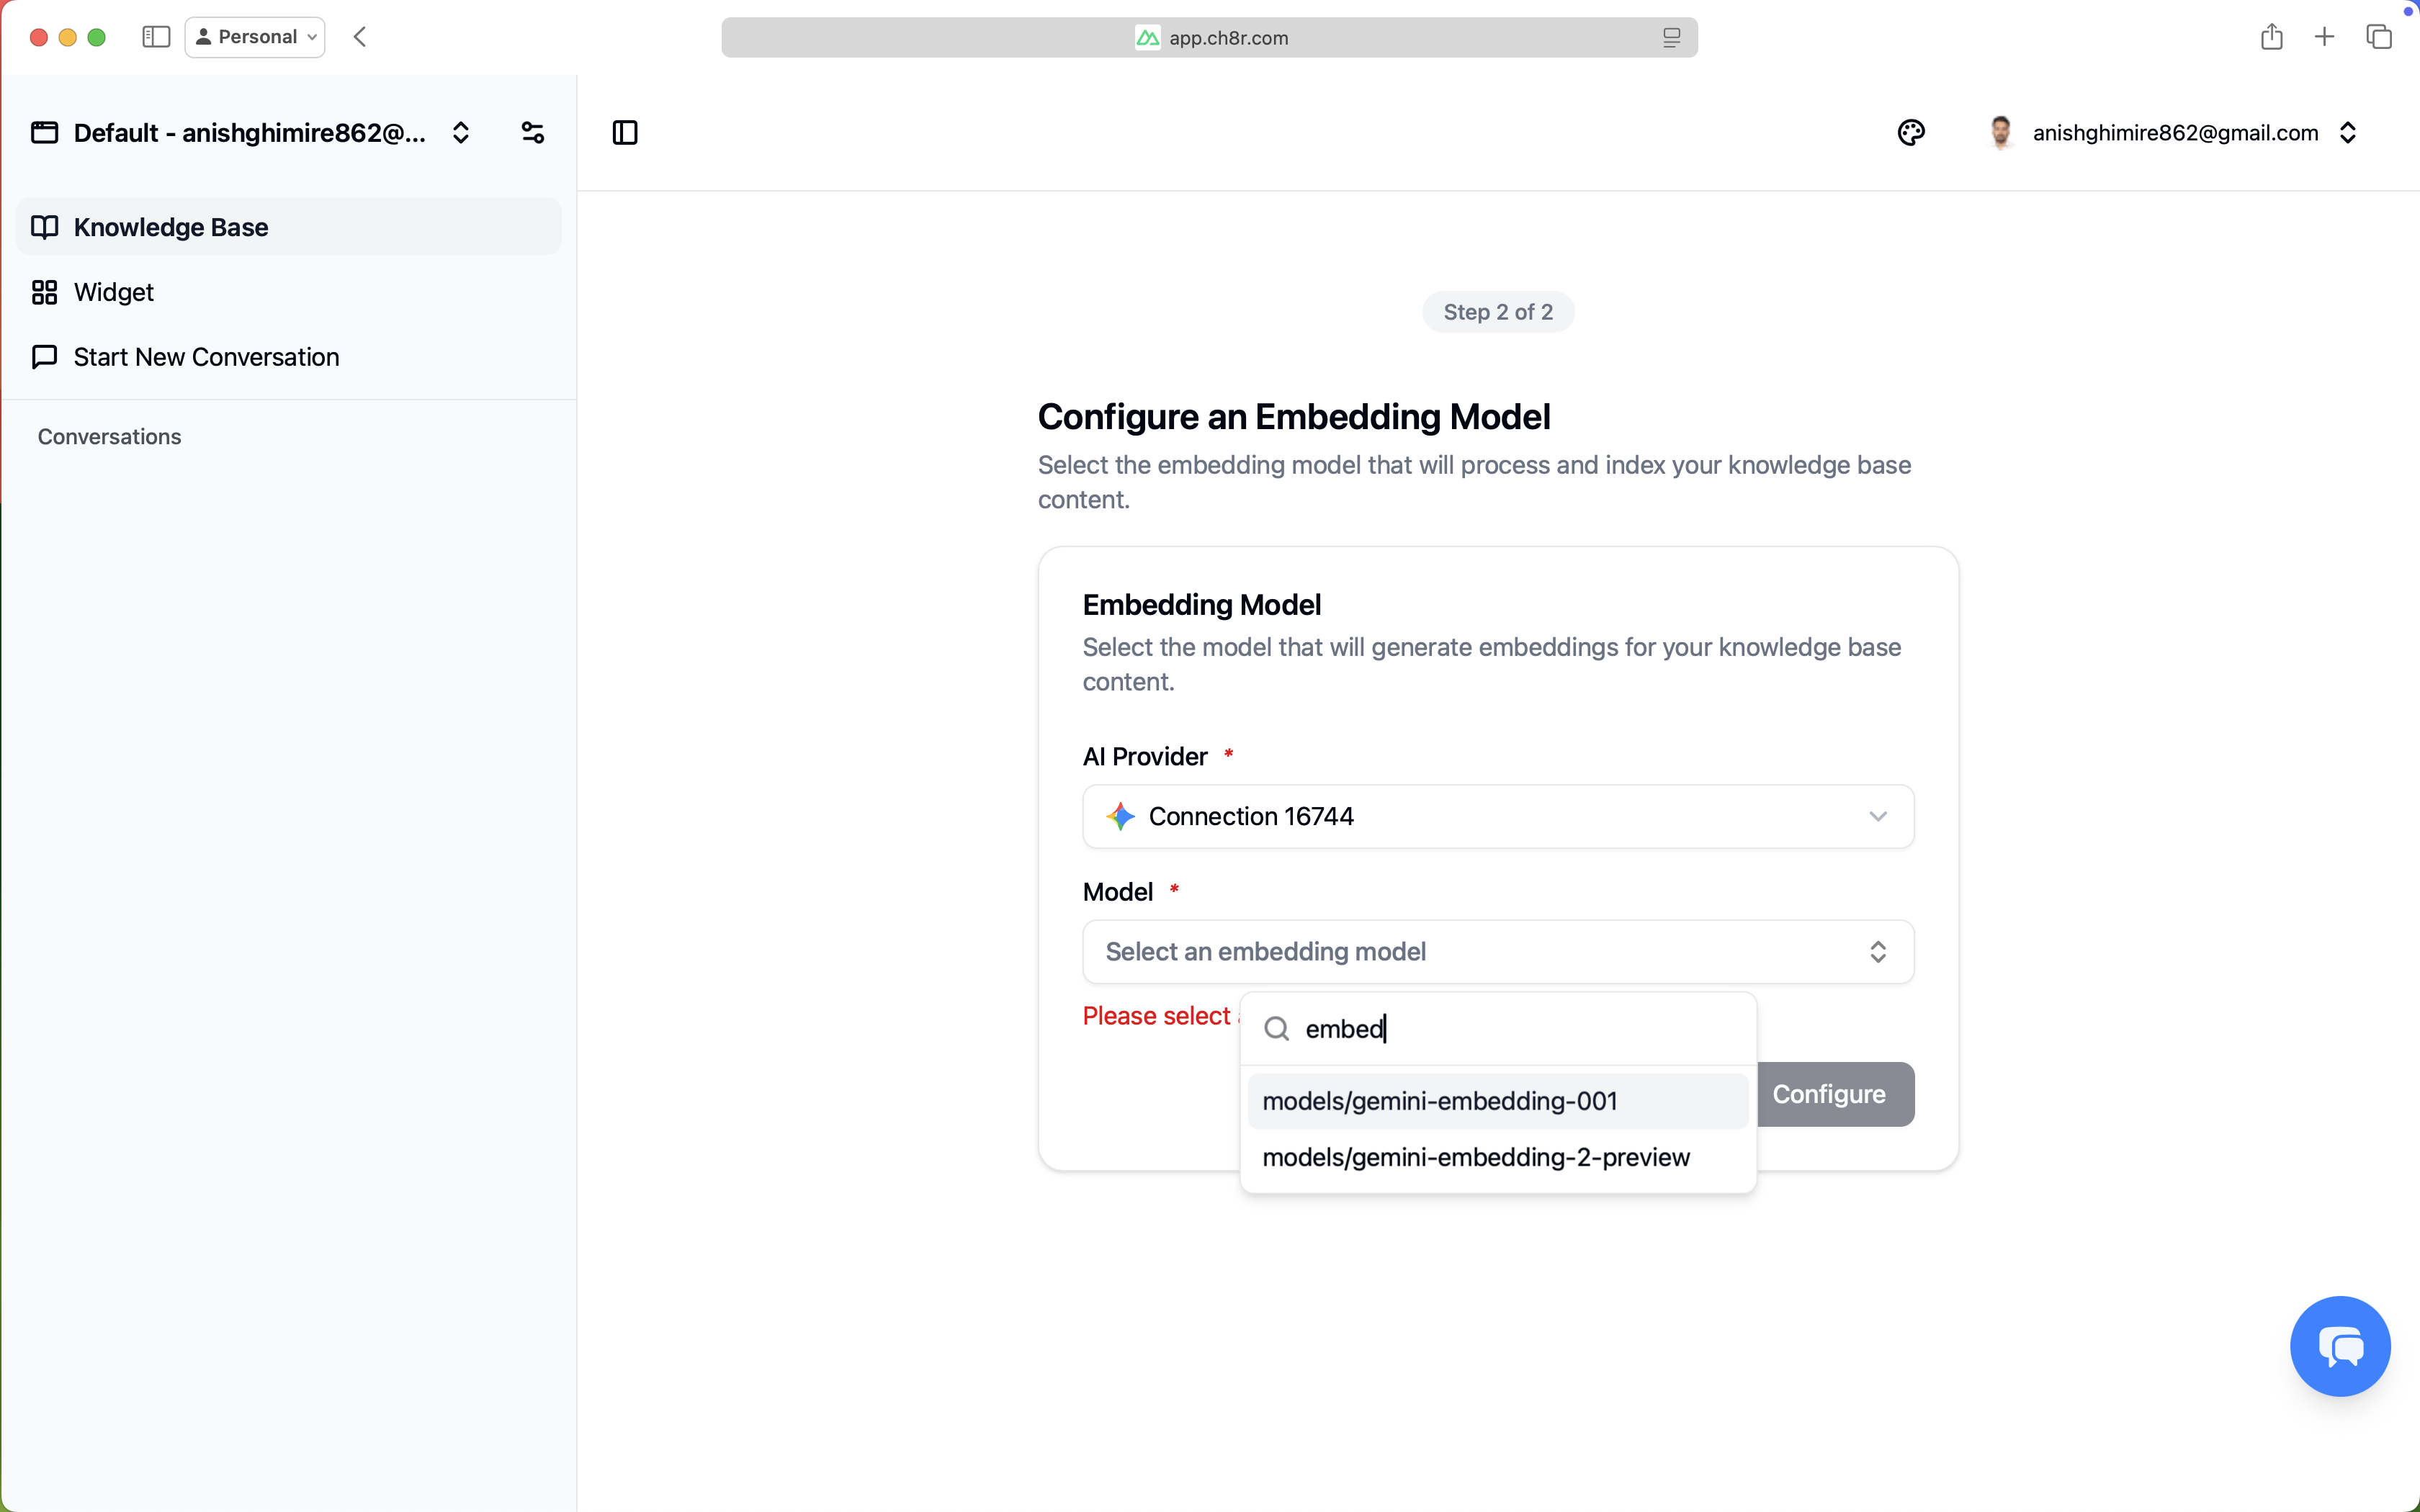
Build Your Knowledge Base
While basic chat works, ch8r's full potential comes from grounding responses in your actual content. The knowledge base onboarding guide helps you ingest your documentation.
To add knowledge base content:
- From the onboarding guide or
Application>Knowledge Base, clickAdd Knowledge Base. - Choose your source type:
- File: Upload PDFs, text files, or Markdown documents
- URL: Enter a web address; enable crawling to recursively fetch linked pages
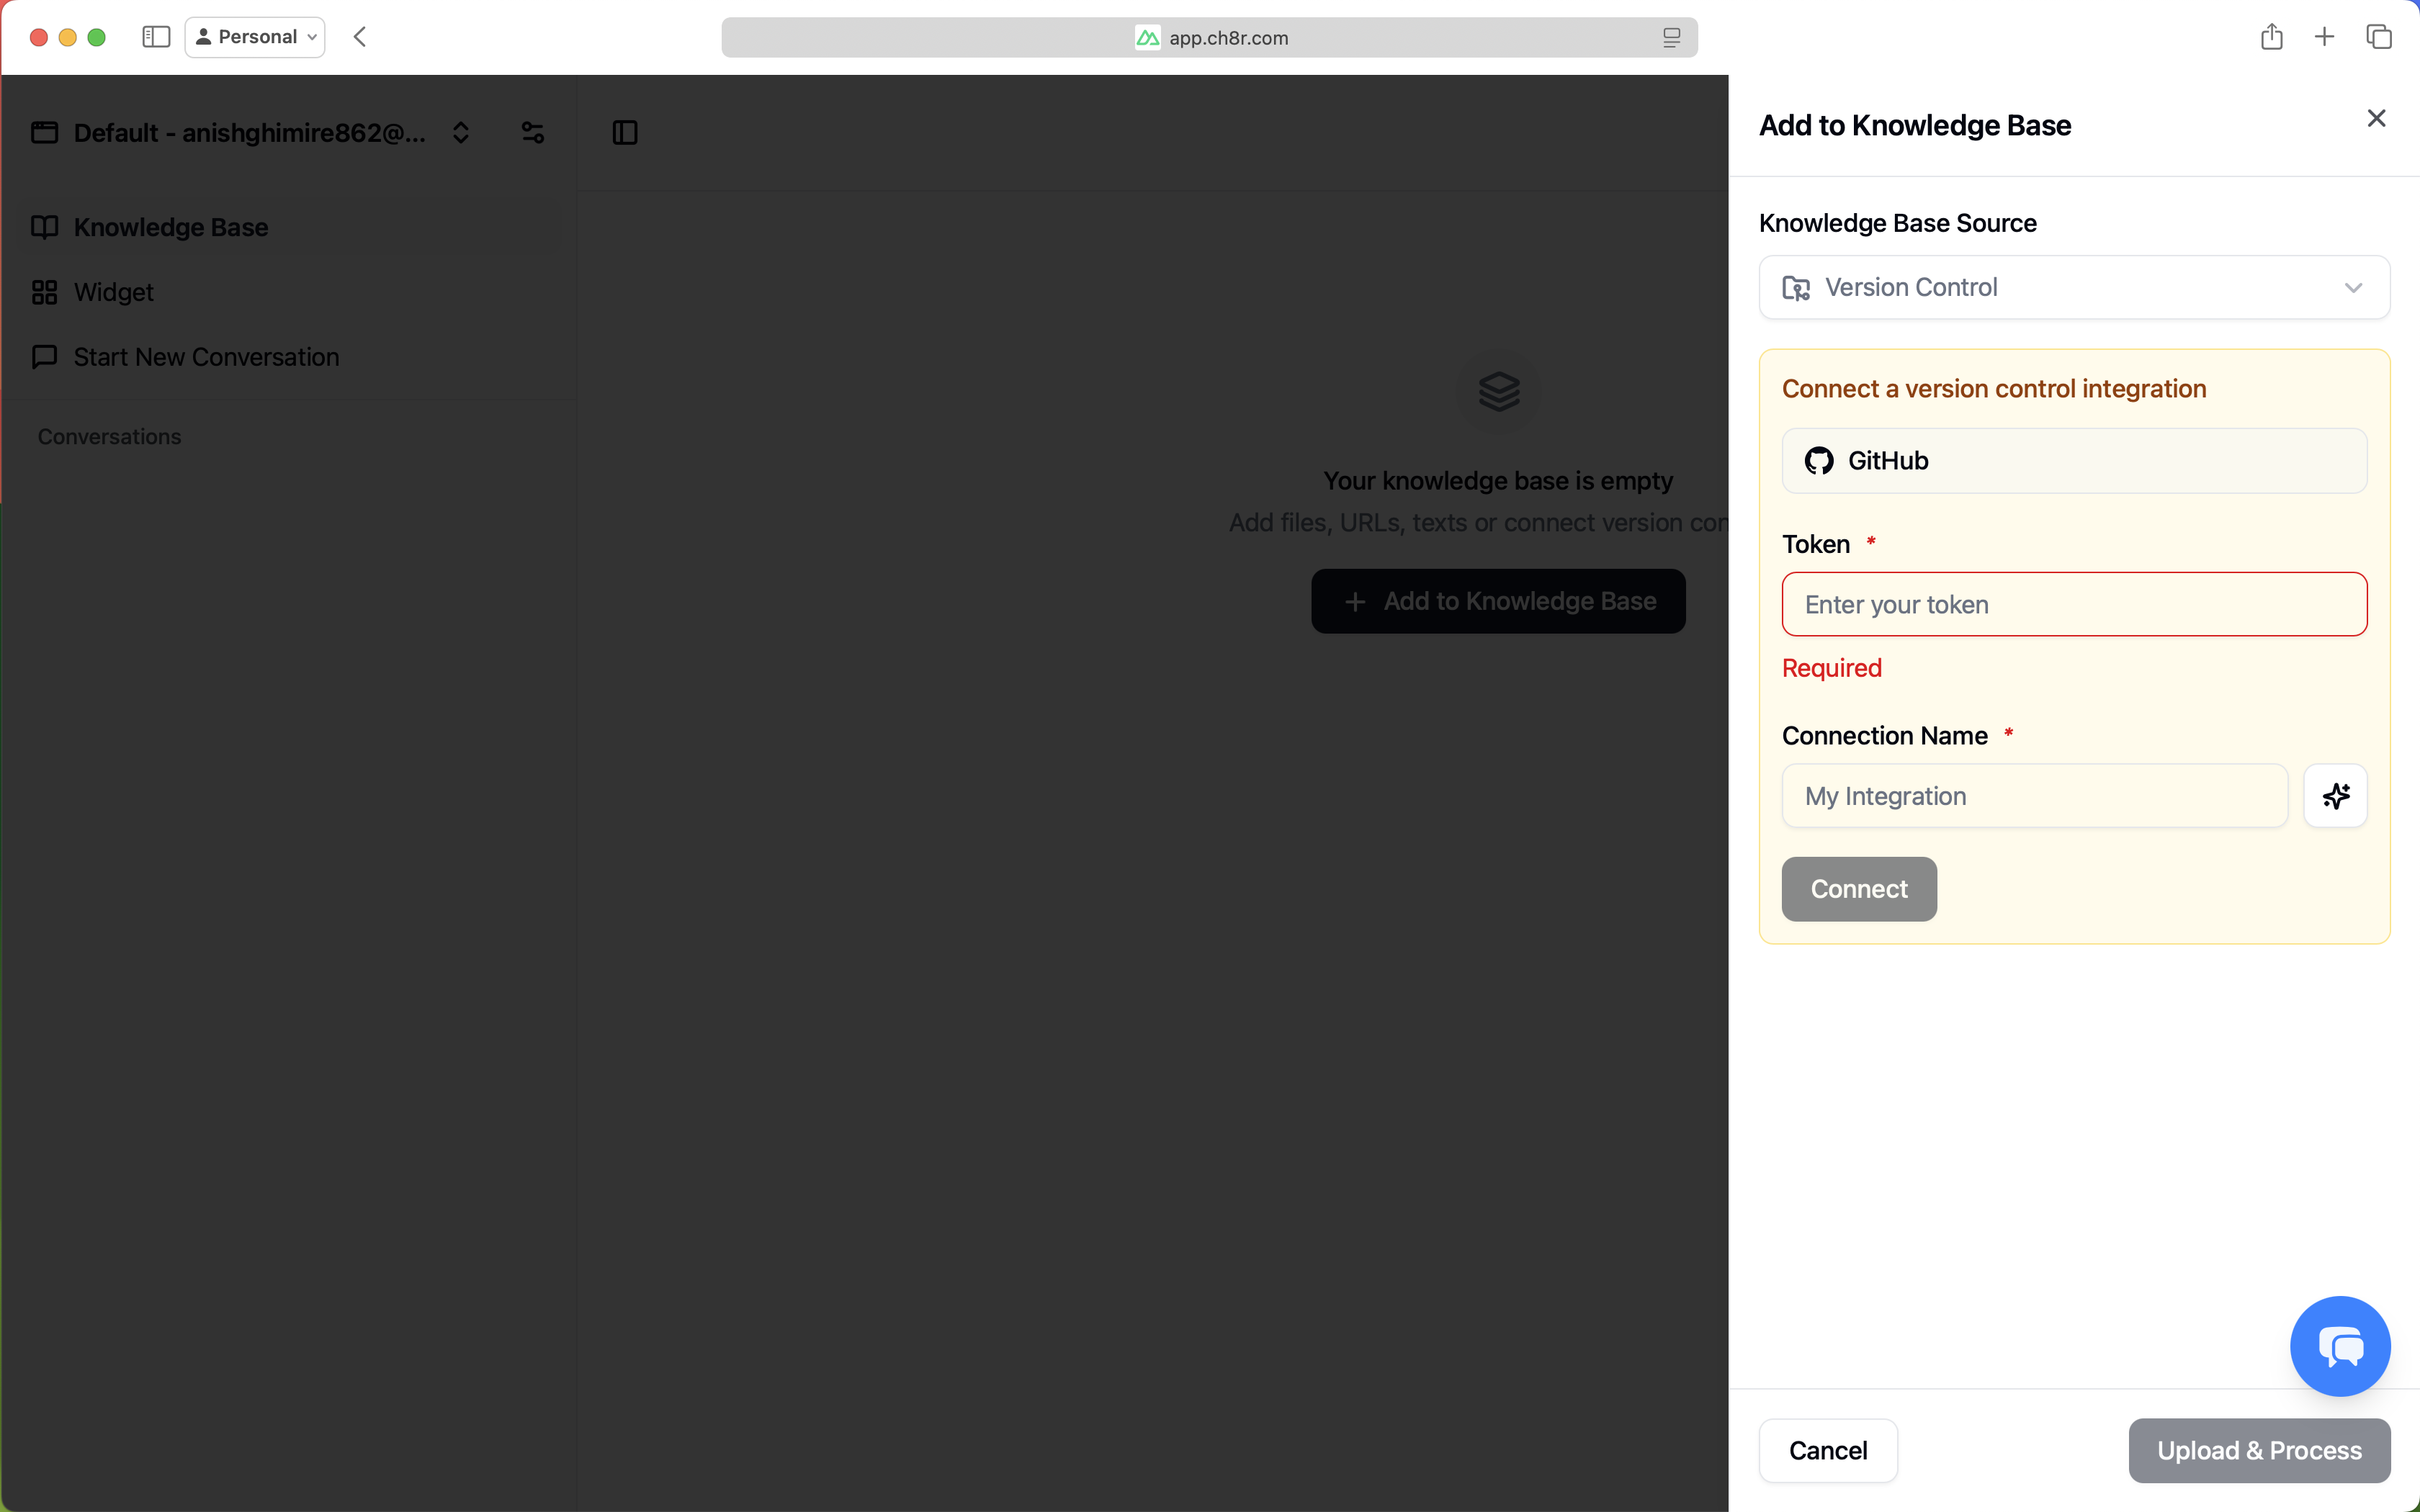
- GitHub: Select a repository and branch (requires a connected integration)
- Text: Paste content directly for quick testing
When you select Version Control as a knowledge base source, you’ll need to connect a version control integration.
Configure Integrations
Integrations enable your AI to interact with external tools - creating tickets, listing commits, or checking issue status directly from chat conversations.
To add an integration:
- From the onboarding guide or
Settings>Integrations, clickConnect Integration - Select your service (currently GitHub)
- Enter your credentials:
- GitHub: Create a Personal Access Token.
- Name your integration and click Connect

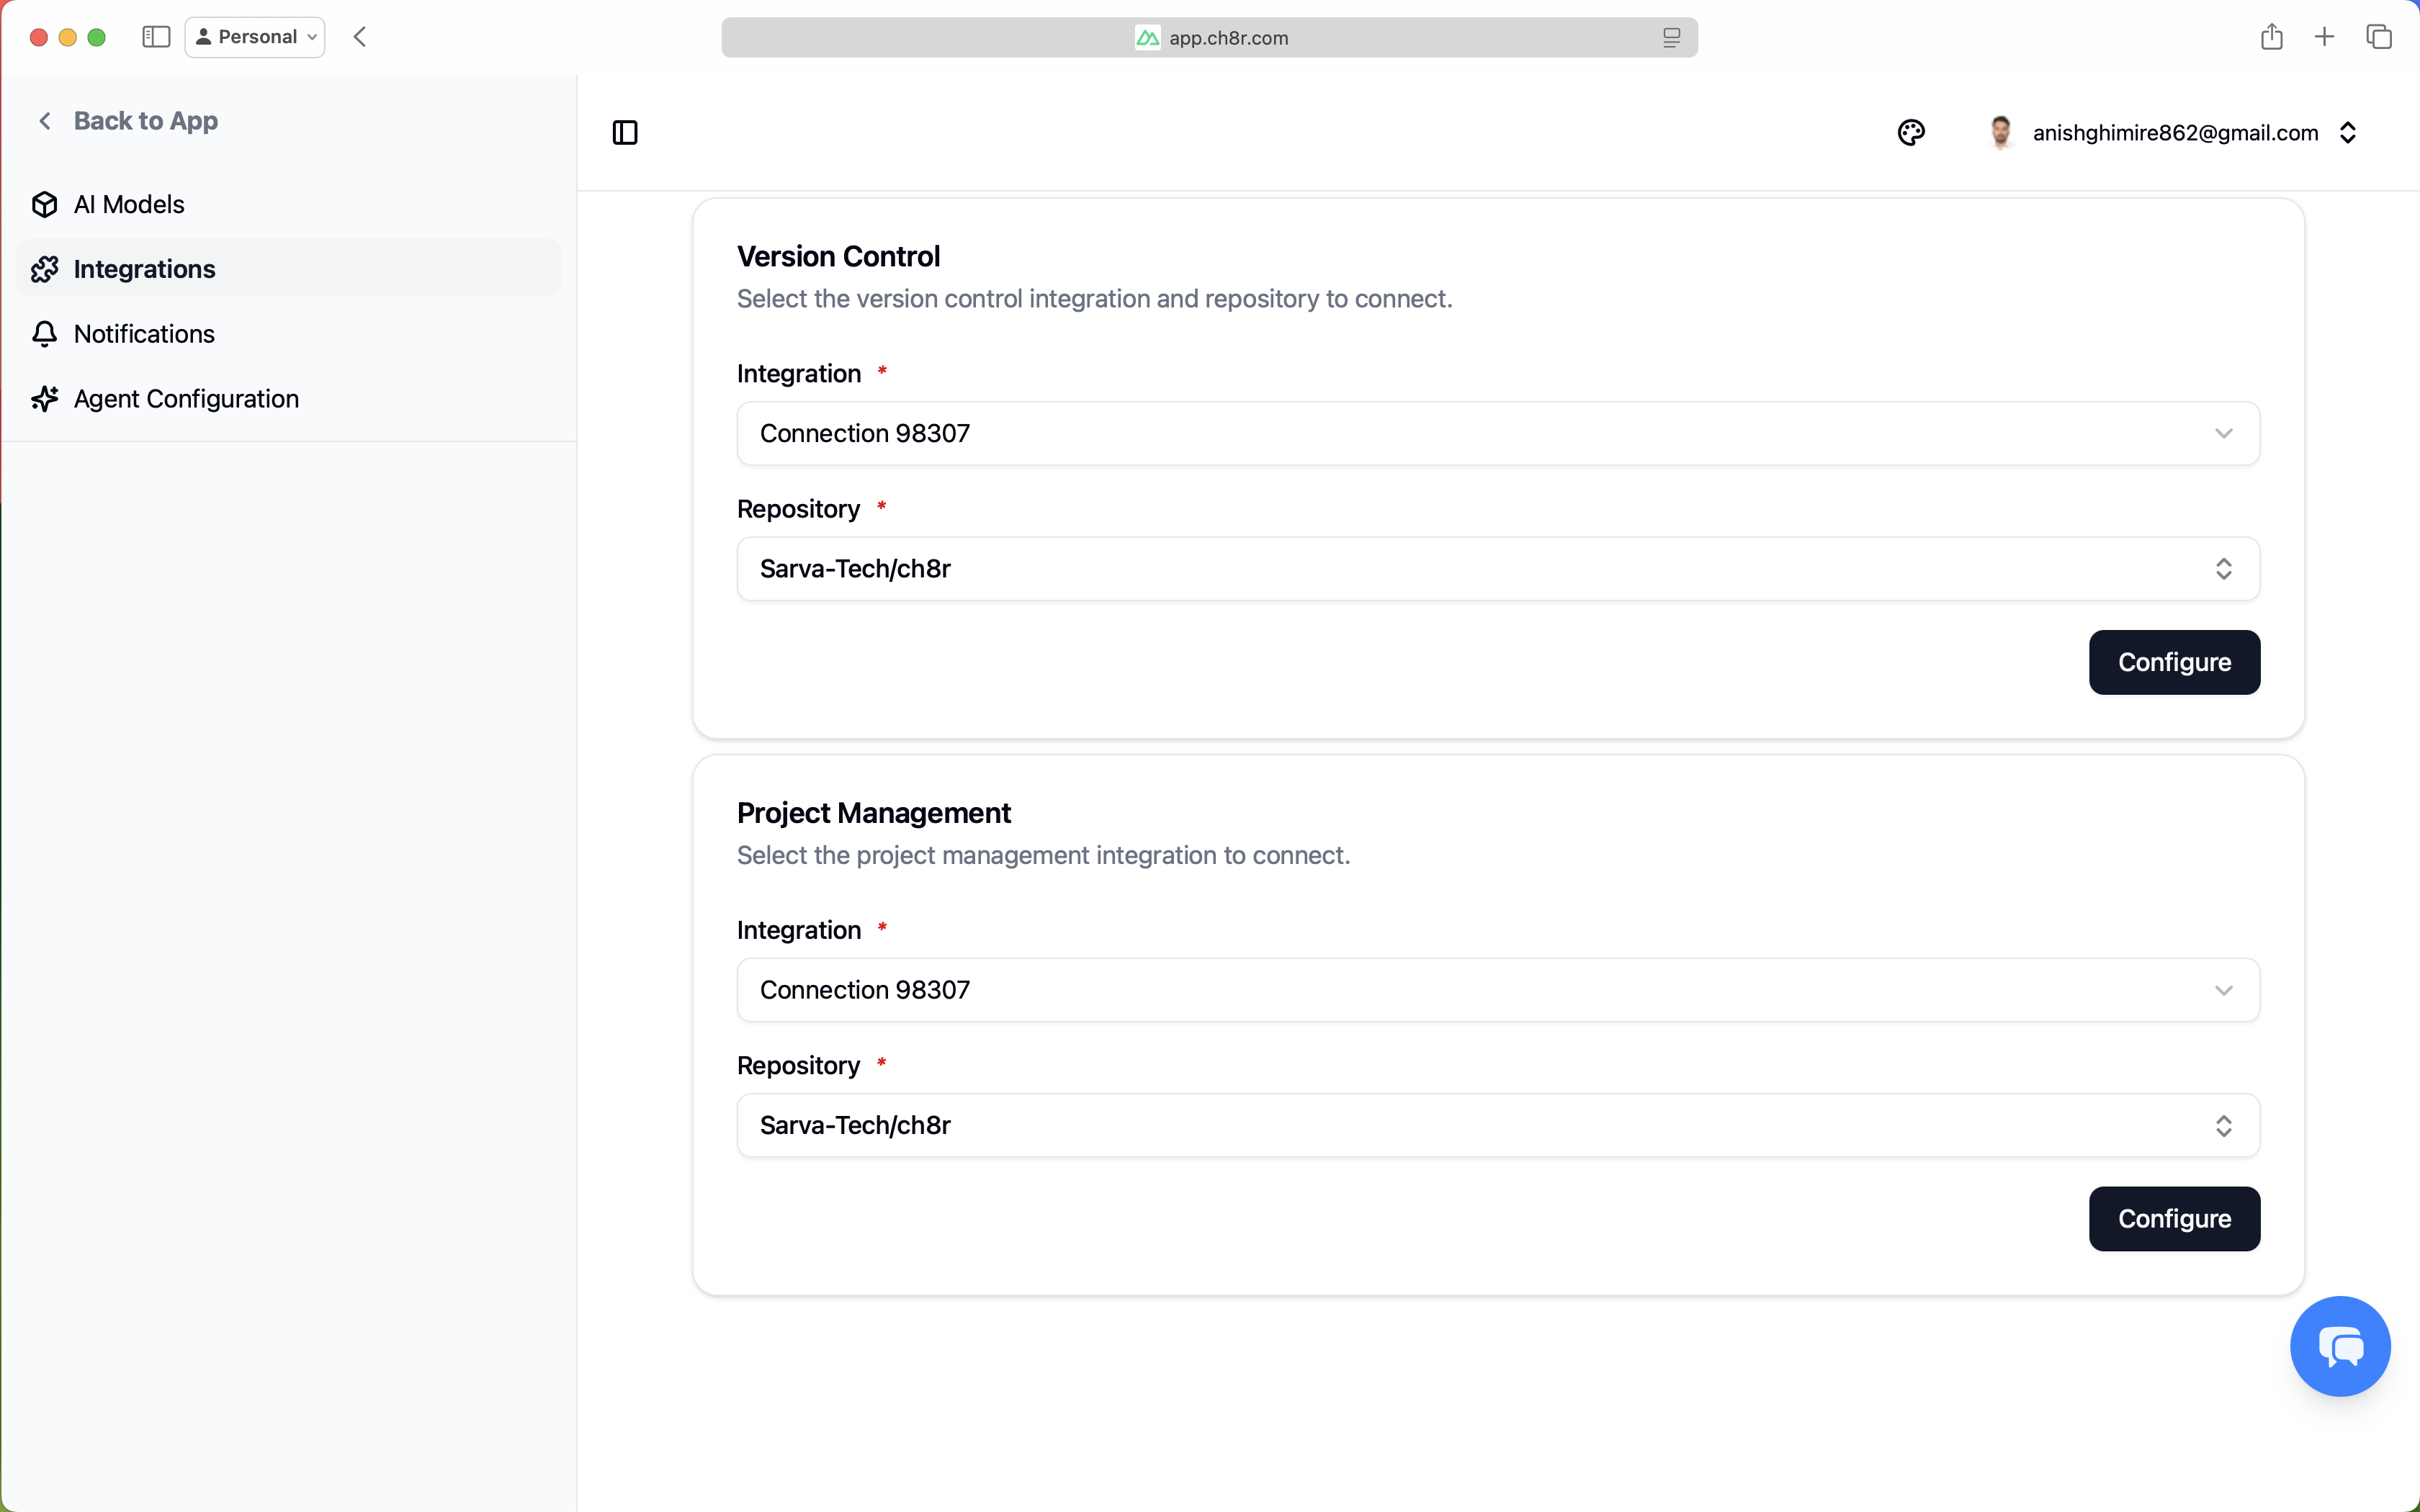
To link the integration to your application:
- Navigate to
Application>Settings iconnext to application name >Integrationsor click onConfigure App Integrationcard from onboarding UI. - Select your connected integration
- Select repository and branch (for version control and project management using GitHub)
From this page, you can enable actions for each integration. If a user reports an issue, the AI can create a ticket. If they ask about releases, it can list commits to generate a response.
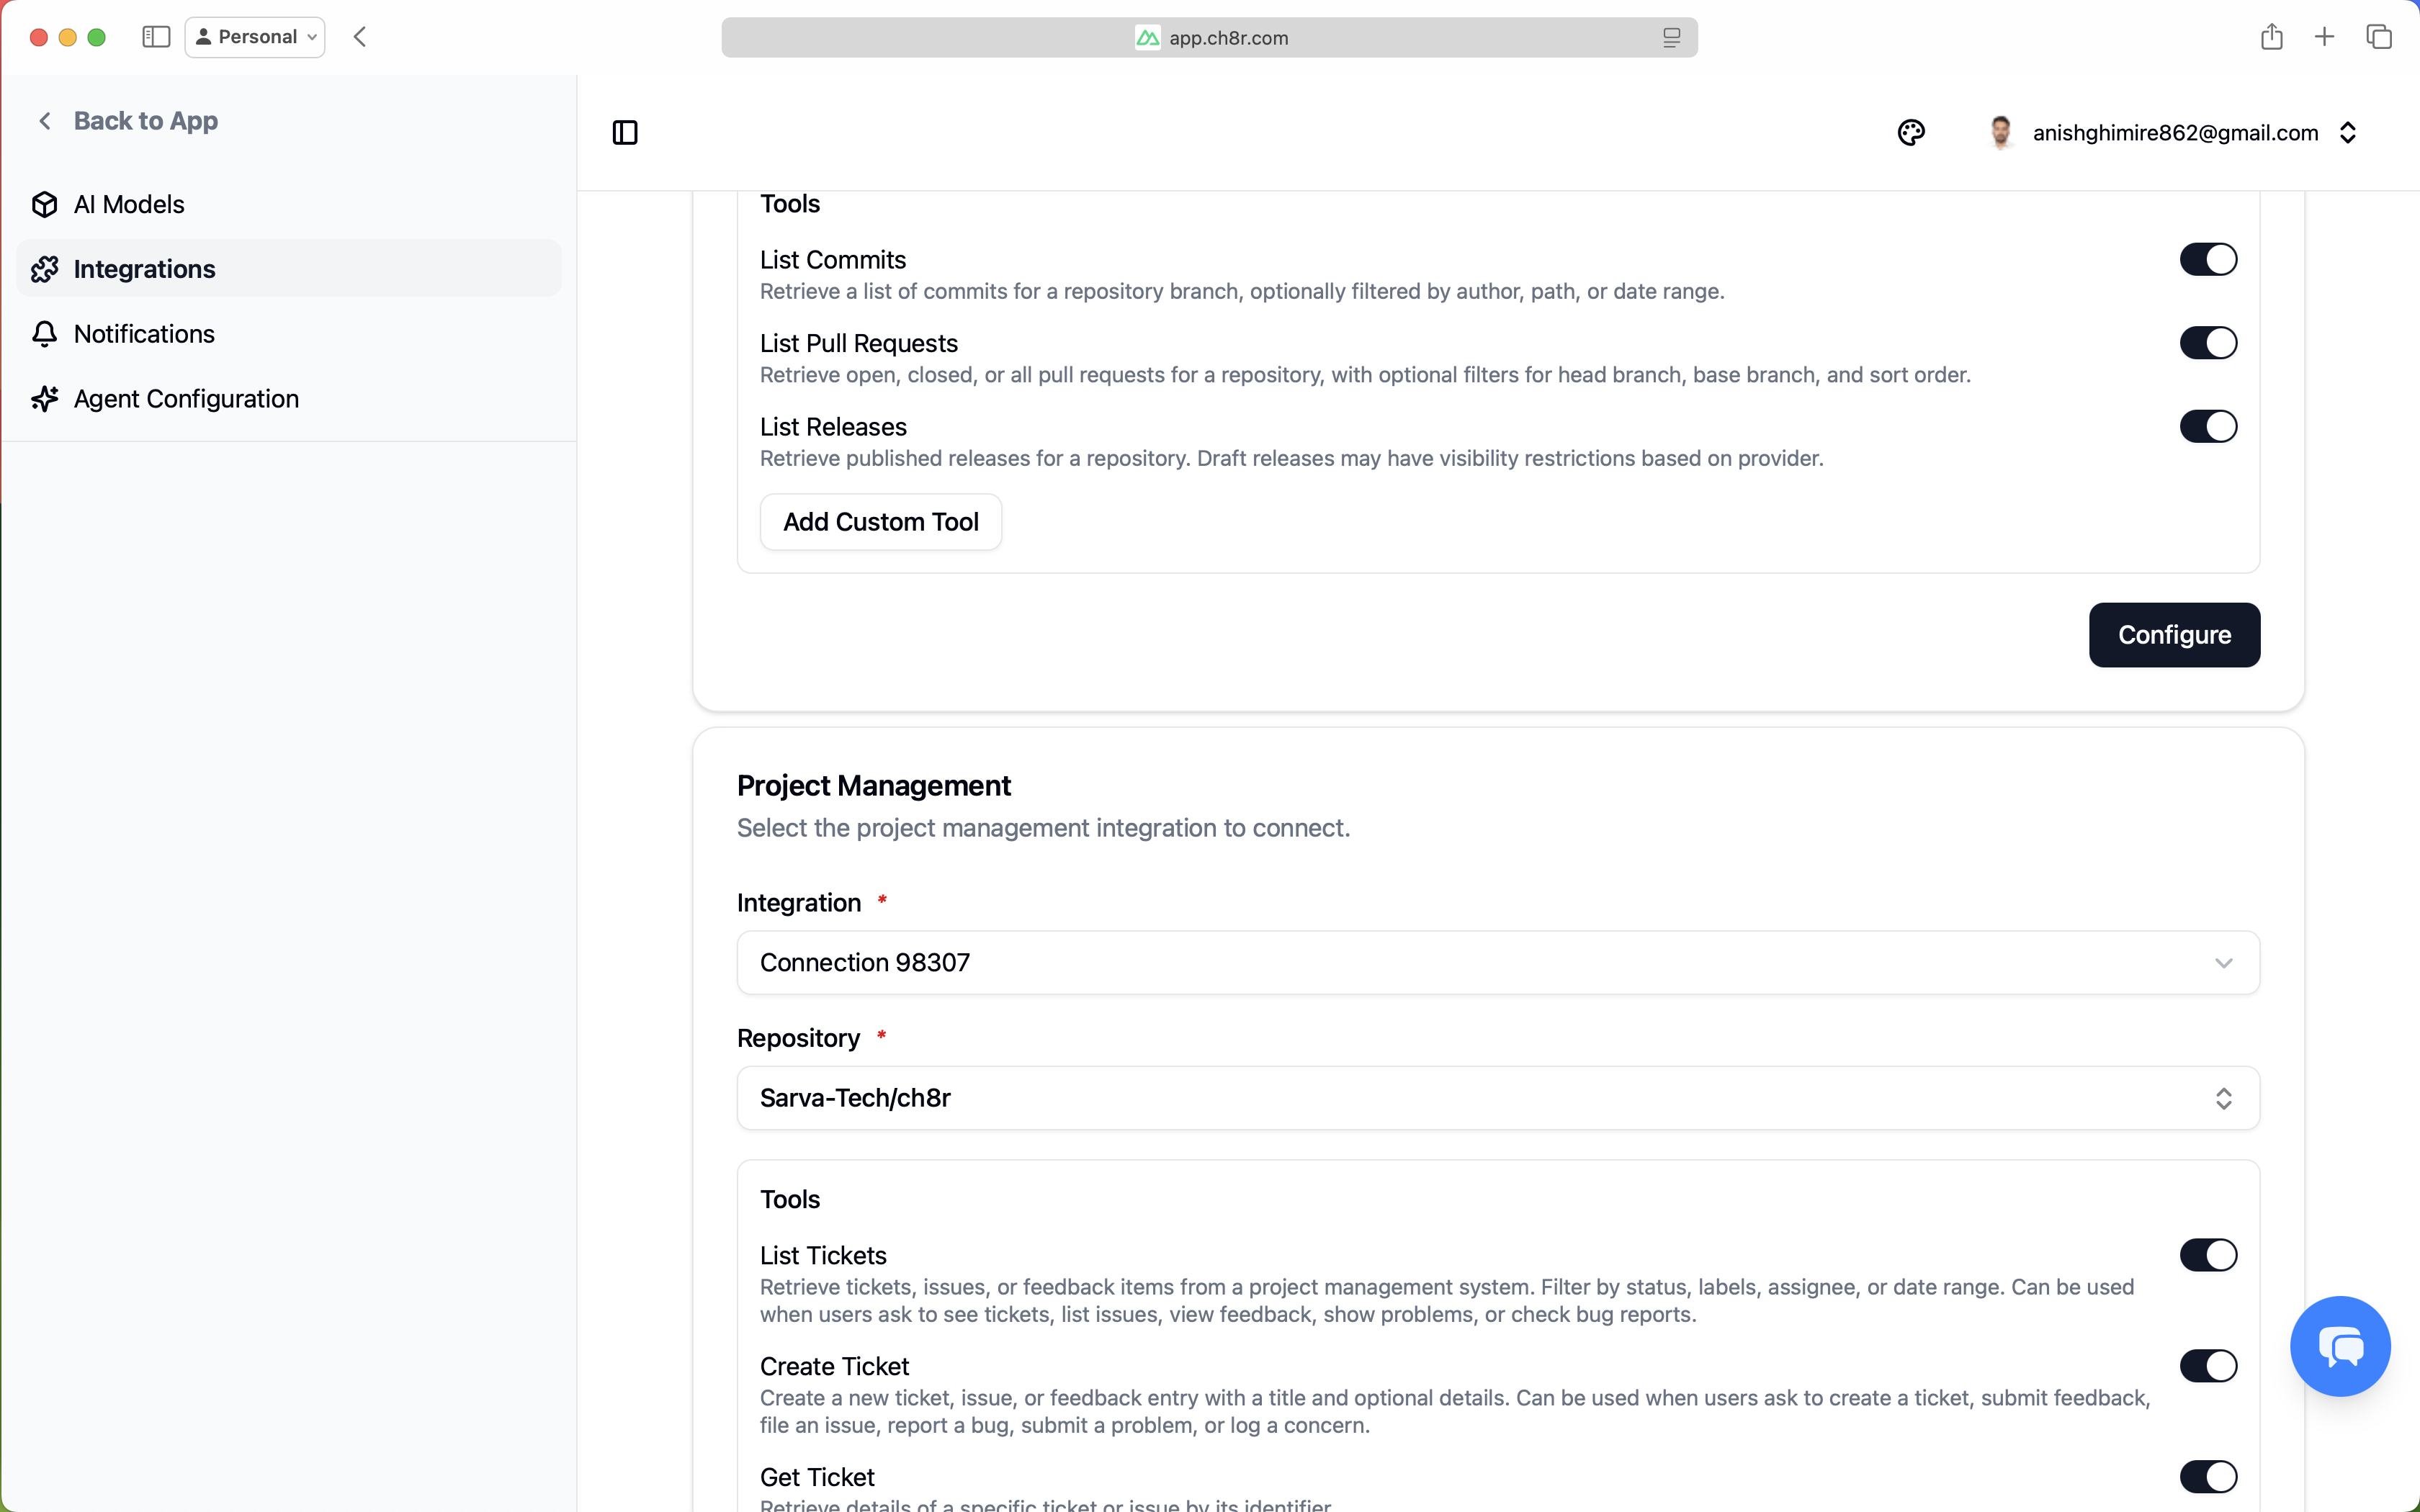
Toggle actions on/off based on your needs:
- list_commits — Let users ask "What changed recently?"
- create_ticket — Let users say "File a bug for this"
- list_tickets — Let users ask "Show open issues"
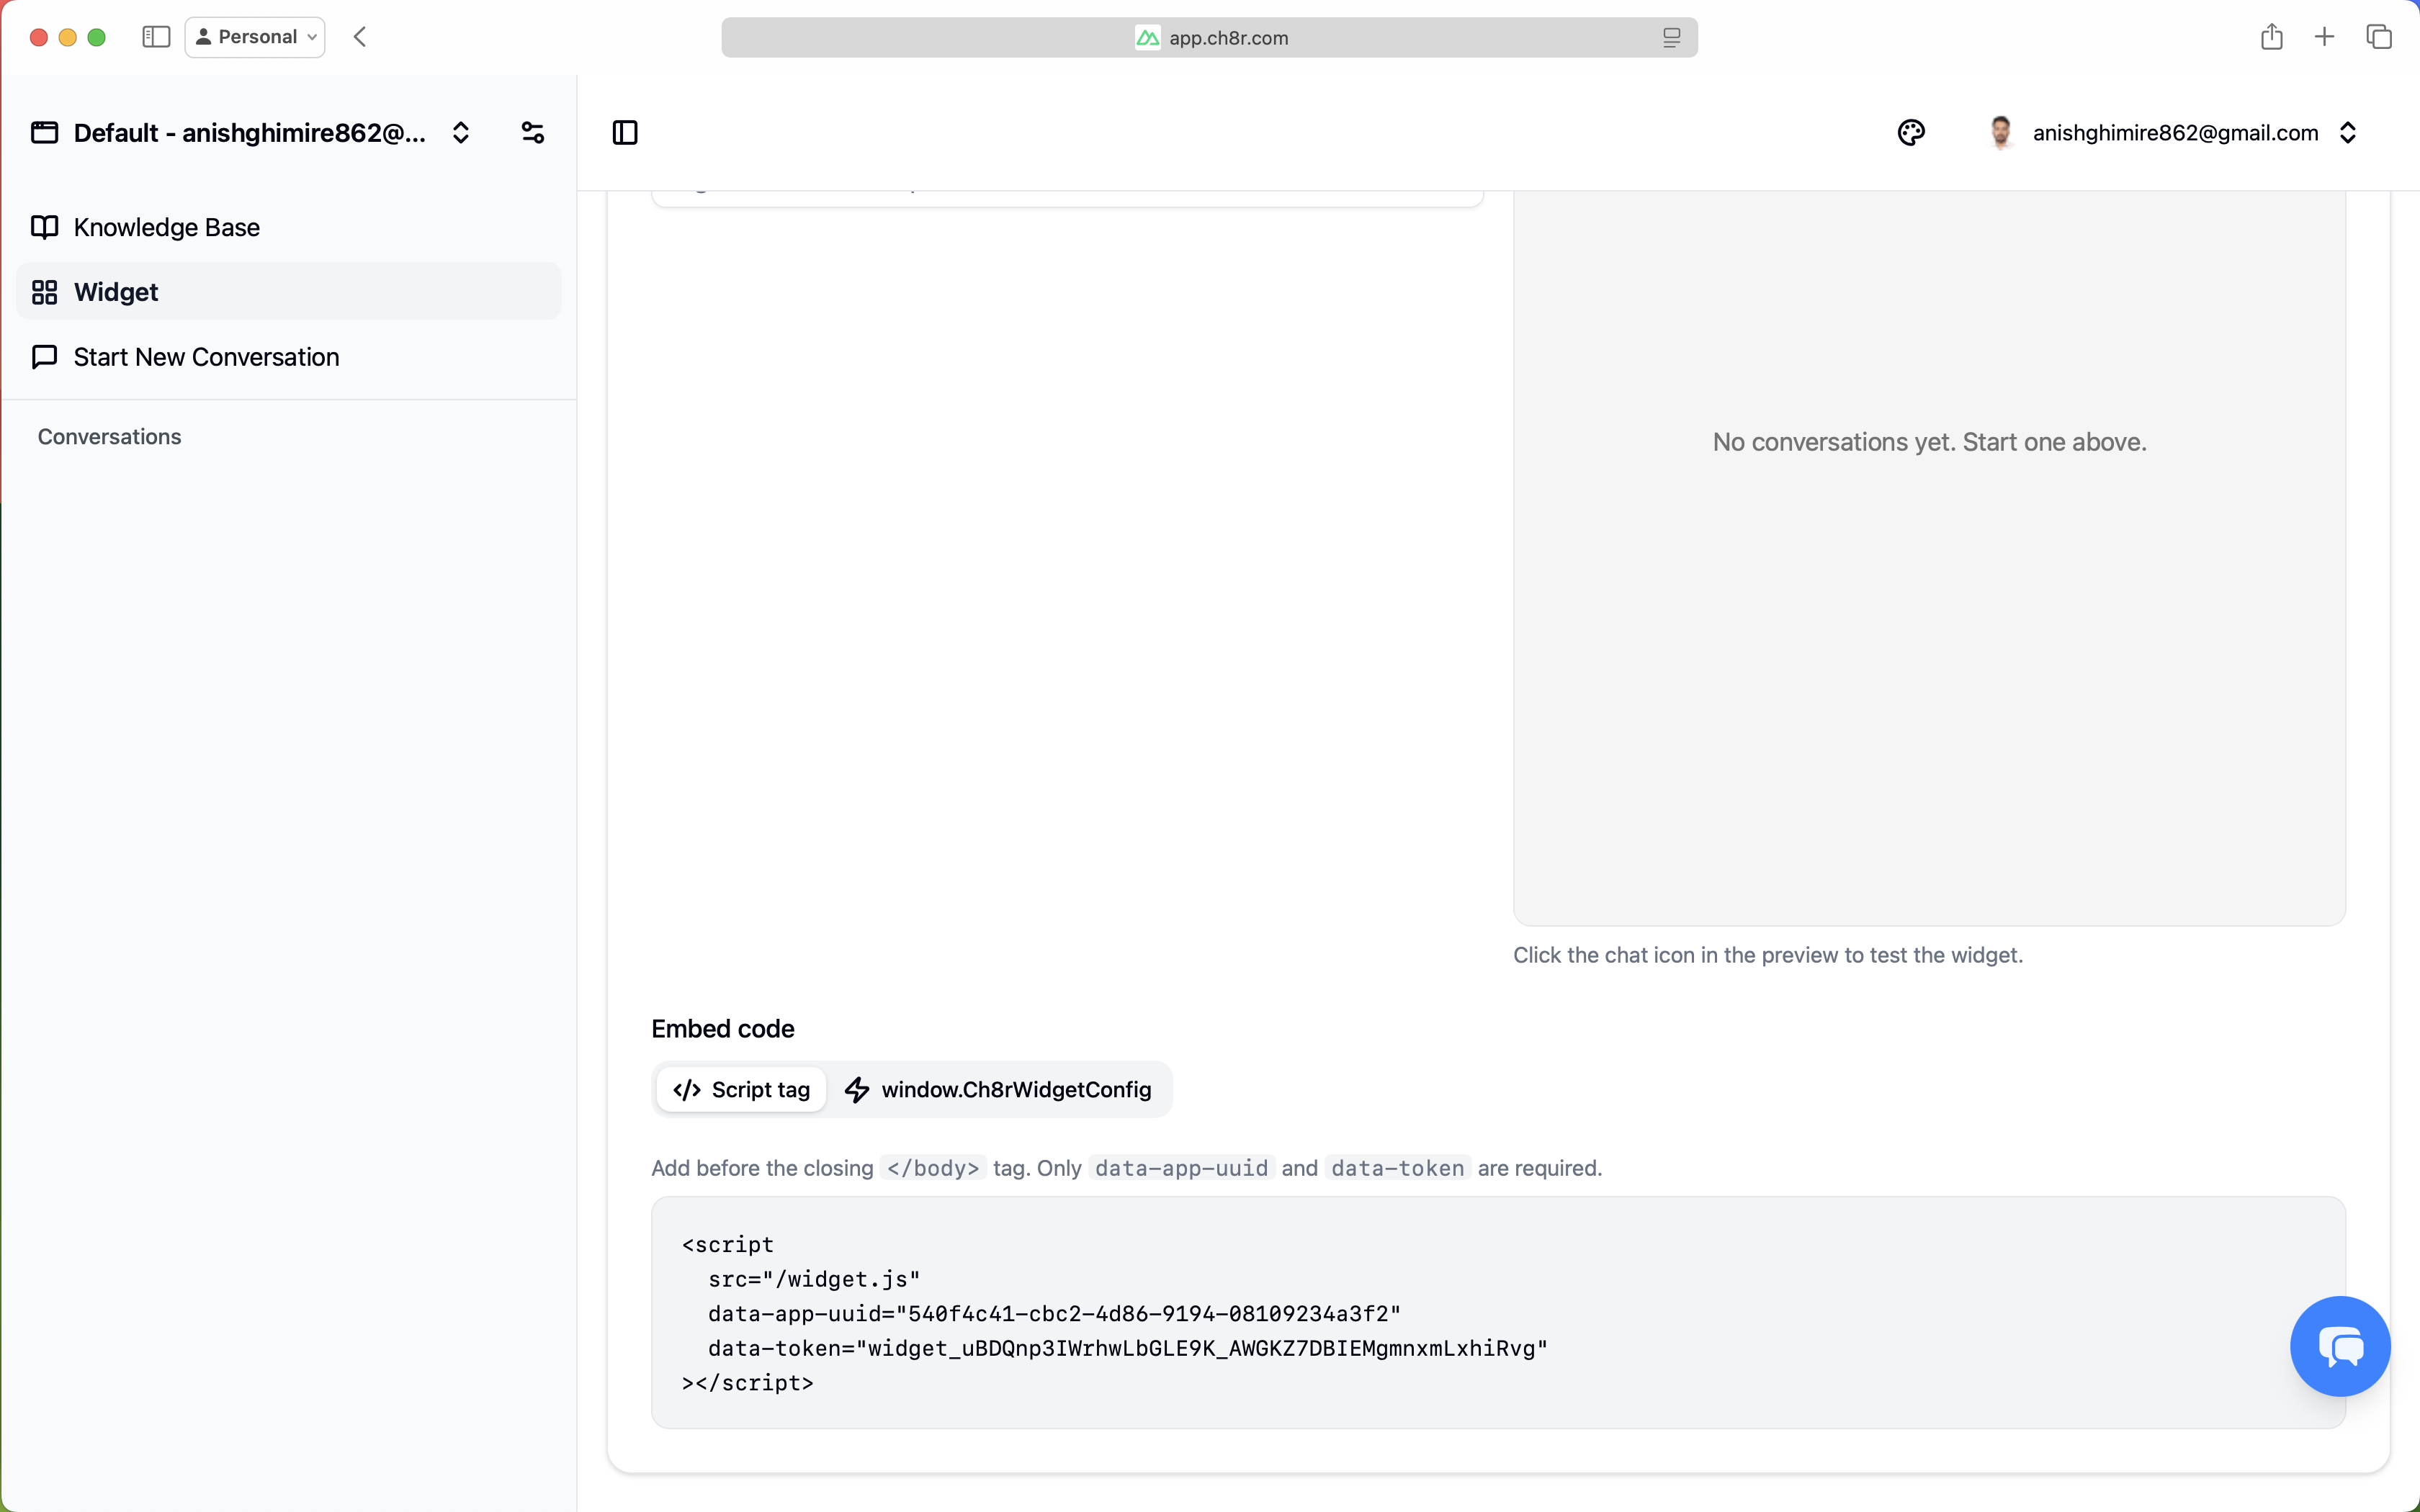
Embed the Widget
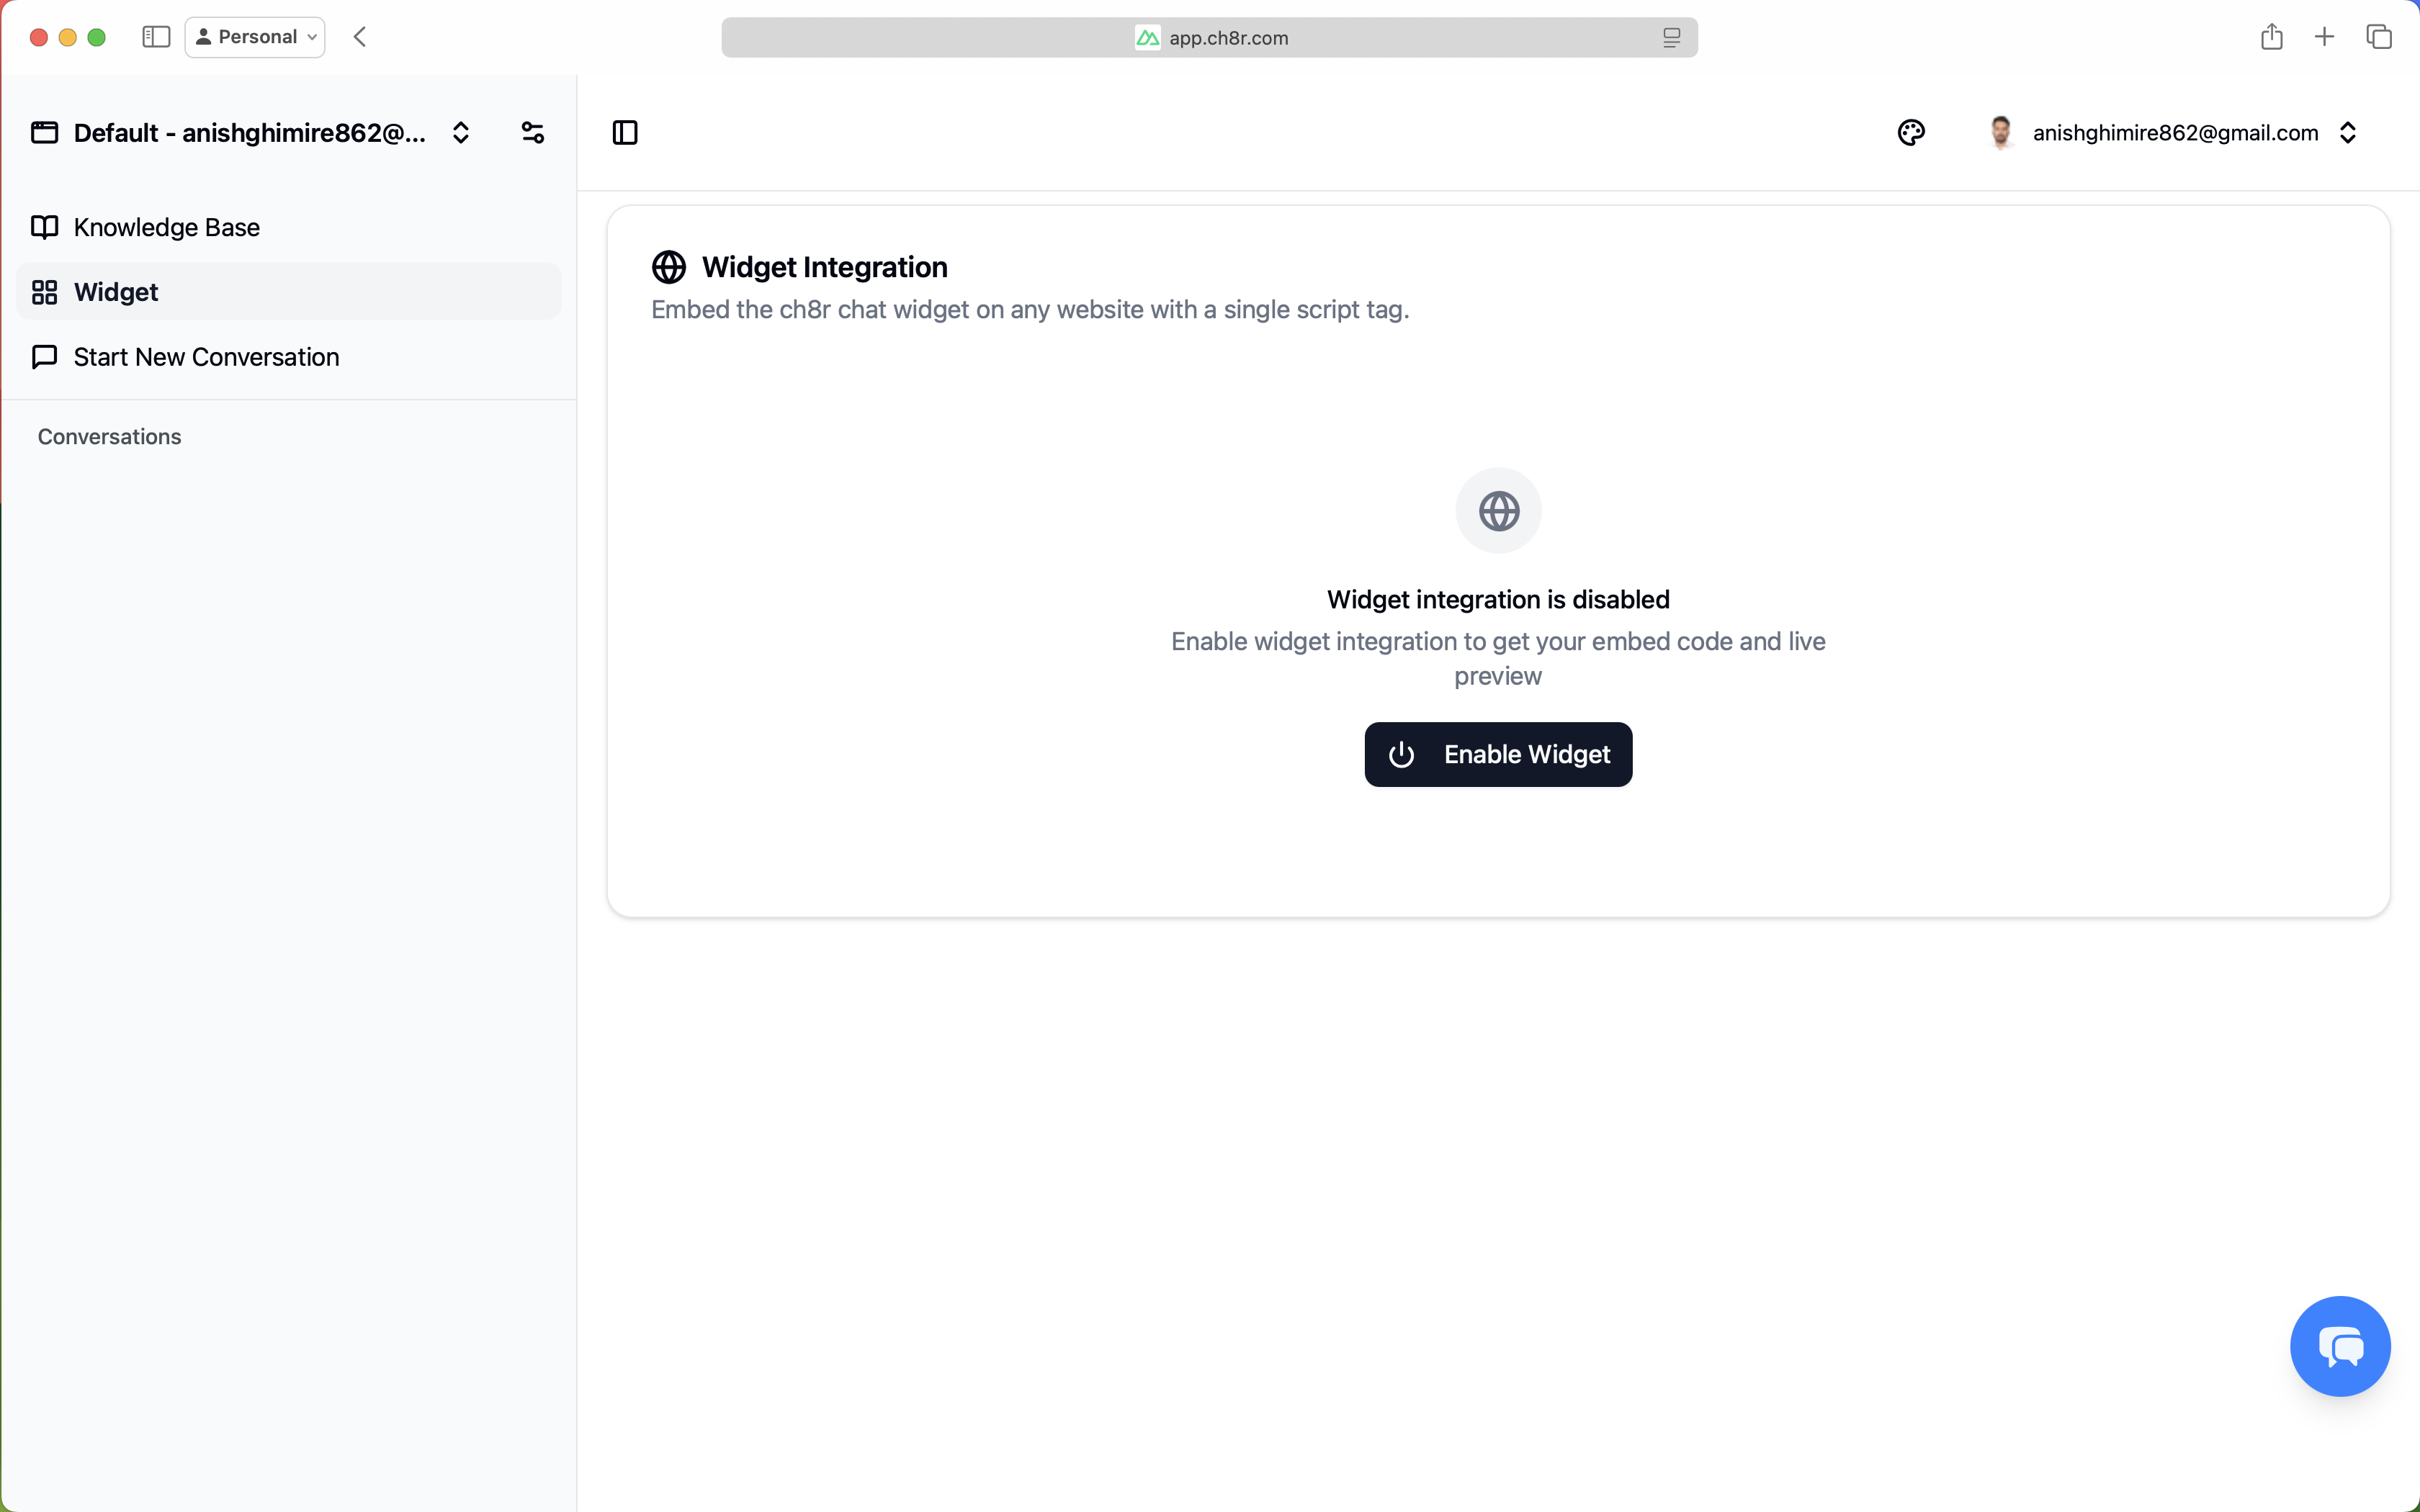
The final step makes your AI available to customers via an embeddable chat widget.
To enable the widget:
- Navigate to
Application>Widget - Enable Widget.
After enabling the widget, you can configure its theme, position, description, brand name, and
greeting, and preview it live. Once you're satisfied, copy the embed code and add the provided
script tag before the closing </body> tag.
Agent Configuration
You can define your agent’s persona, tone, and response style by clicking the settings icon
next to the application name, then navigating to Agent Configuration.

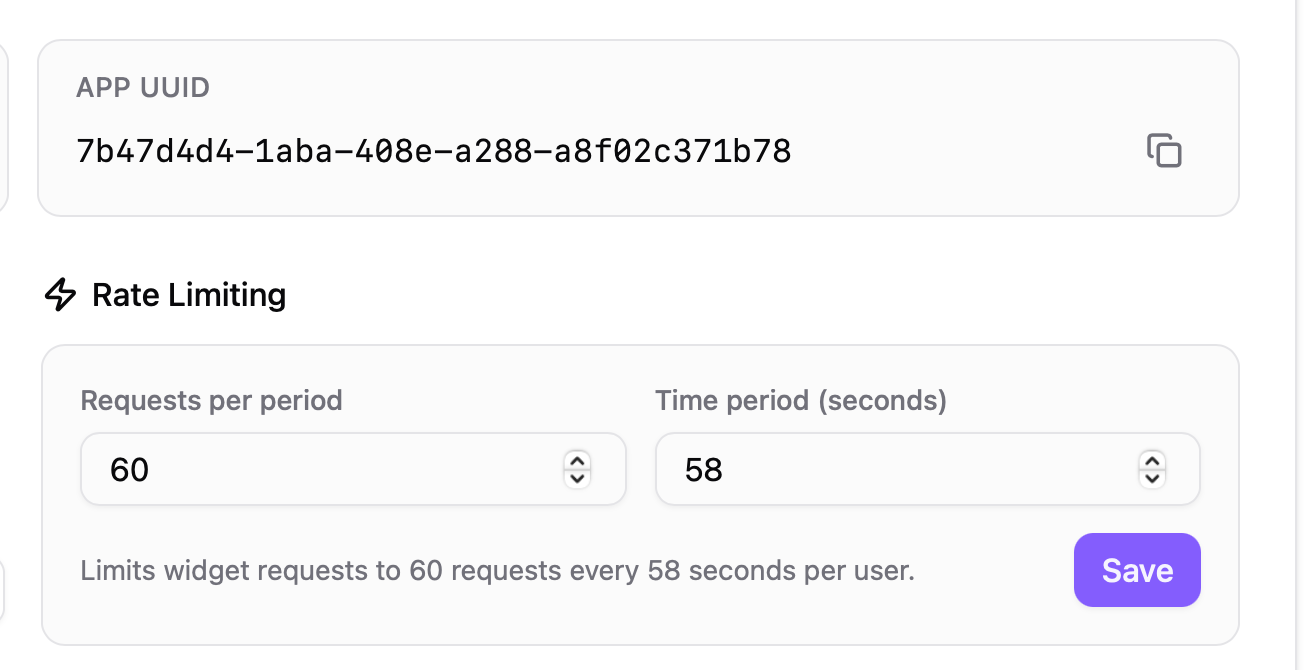
Rate Limiting
ch8r includes configurable rate limiting to protect your AI endpoints from abuse and manage costs. Rate limits apply to widget-based chat requests on a per-user basis.